Are you in the early stages of setting up your Shopify store or Facebook (Meta) Ads? If so, you might be wondering how to go about adding the Facebook Pixel to your Shopfiy page.
Don’t worry, it’s super simple. While sometimes adding bits of code or altering your page can seem daunting if you’re not too familiar with coding, Shopify and Facebook make it easy on you!
What is a Facebook Pixel?
Before we dive into how to set up the Facebook Pixel, let’s briefly explain what this is. Basically, a pixel is a literal pixel–a teeny tiny dot on every page of your website. It is a small bit of code that enables Facebook to track how users interact with your pages. Be it a click or a purchase, with a Pixel on each page you know what people are doing.
This, in turn, enables Facebook to see what ads are most effective in getting conversions and give you data on your campaign performance outside of the Meta environment.
Setting up a Facebook (Meta) Pixel on Shopify
Now that you know what you’re installing, let’s get down to how to do that in just 3 steps.
Step 1: Create a Facebook Ads account
Before we get started with any Pixels and tracking, you need to make sure that you have your account set up so you can advertise at all!
First, you need to make sure you have a company account linked to your page through Meta Business Suite. After logging in through your personal Facebook account, go to: https://business.facebook.com/
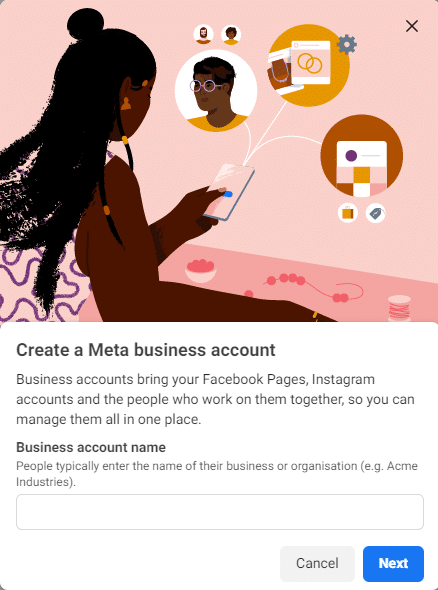
You’ll see a side menu with a dropdown at the top left. There will be an option that says “Create a business account.” Click that and you’ll see the image below.

Follow the steps that you’re prompted with to verify your business email and set you up as the administrator. You will be able to link your Facebook Page and Instagram account to a single Business Suite account. If this is already set up, but you’re not the Admin, you’ll need to request Admin access.
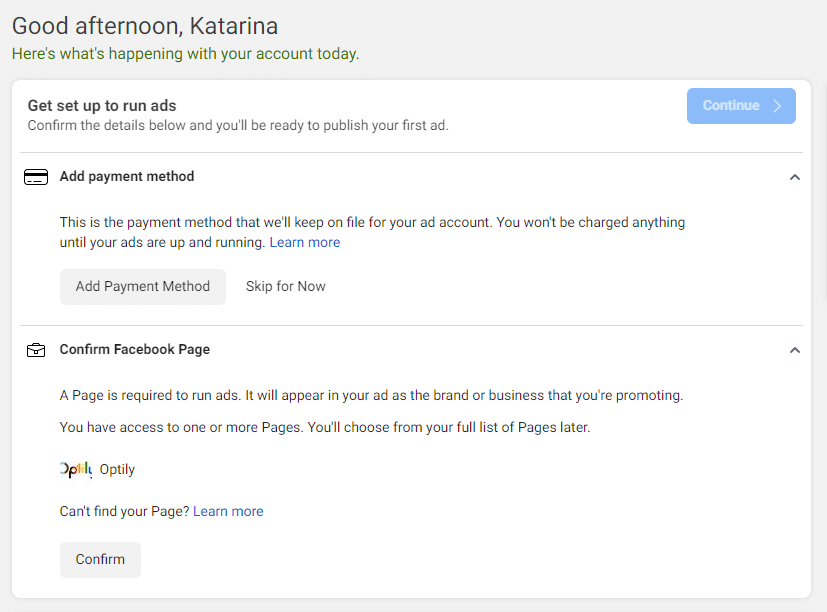
Next, to set up Facebook Ads, you’ll need to go into Ads Manager to see your personal ad account ID in the top-left dropdown. Under Account Overview in the left nav bar, you’ll be prompted to add a payment method and select the Page you want to advertise for.

Now, you should be all set with your Page and Ad account. The next step before launching your ads is to make sure you can track them with your Pixel.
Step 2: Create a Pixel
Going back to Meta Business Suite, navigate on the left to Settings >More Business Settings > Data Sources > Pixels.
You’ll be prompted to add a new Pixel at this stage. Make sure the name is unique, in case you create any new ones in the future.
You’ll also be asked to type your website URL here in order to verify it. You can only have one Pixel for each verified domain.
When you click Continue, you’ll see the next step.
Select the second option and it’ll route you to the next screen:
Since you have Shopify, Facebook makes it easy on you to connect your pages. Click the first option here and you’ll be taken to the next screen that offers you a selection of partners. Of course, click on the Shopify one and you’ll see the next image.
Step 3: Connect Facebook to Shopify
First, you’ll need to install the Facebook channel on your Shopify page. This will give Shopify permission to access your Facebook Page, ad account, and Business Manager.
Next, you need to enable data-sharing in the Customer data-sharing section within the Settings of the Facebook channel on Shopify.
Then, you go to Customer data-sharing under your Data Sharing settings and there should be a list of your Pixels. You should see the PIxel that you created in Step 2 and you can select that now.
You can now go back to the Facebook Pixel wizard and select the box that says you’ve completed the setup on Shopify.
You’re connected to Facebook now!
Next steps after connecting the Facebook Pixel
While connecting to the Facebook Pixel is a valuable first step, it’s not as powerful a tool on its own these days. There have been many changes to online tracking laws and policies, like the iOS 14.5 update, that have disrupted the data that can be passed through the Pixel.
We’ve got a whole guide on these changes, how they’ve impacted Facebook marketing, and what you can do about it. Check out our brand new guide that helps Shopify businesses continue to improve their return on ad spend despite iOS 14.5.
We know you’re busy, so the tl;dr of the guide is:
- Use an ad spend optimization tool like Optily
- Diversify beyond just Facebook and Instagram for growth
- Use the Facebook Conversion API to fill in the Pixel’s blanks


